Cesium系列(6)--点线面缓冲区
Cesium点线面缓冲区实现
上篇文章主要展示了我最近封装的一些常用工具,接下来几篇文章主要介绍相关功能的实现。这篇文章就介绍一下关于三维缓冲区的实现原理。
原理
其实从事 Webgis 相关的道友都用过或者听过 turf.js 这个前端 GIS javascript分析库 (什么?没听过? 道友,最近游戏红尘了吧,哈哈
~), 中文文档地址。turf.js 提供了很多分析方法,具体我就不展开说了,一个是我了解的也不是很清楚,另一个就是人家写的很详细
了,就不班门弄斧了。
三维缓冲区和二维缓冲区实现方式是一样的,都是基于 turf.js 的 buffer 方法,传入相关的参数,然后将生成的 Feature 展示就行了。
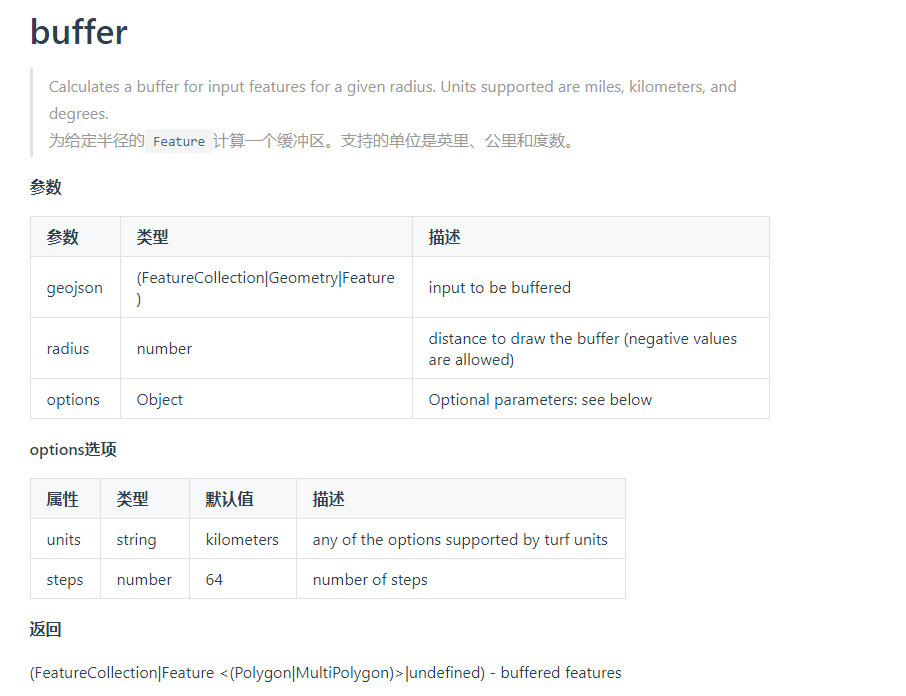
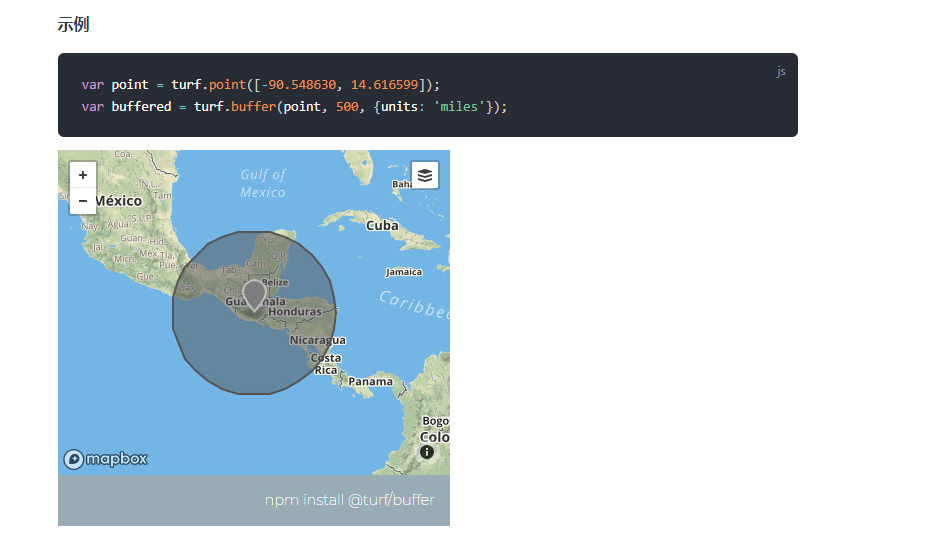
- buffer 方法

- buffer 使用示例
实现
参数很简单,一个是要缓冲的基础几何对象,一个是缓冲半径,默认是千米。基本的绘制交互就不说了,核心的代码如下:
- 点缓冲区
/**
 * 创建点缓冲区
 *
 */
CesiumBufferUtil.prototype.createPointBuffer = function () {

  //添加点
  this.addPoint()

  //添加点的缓冲区
  const coordinate = this.cartesianToLatlng(this.positions[0]).slice(0, 2);
  let pointF = turf.point(coordinate)
  let buffered = turf.buffer(pointF, this.radius)
  let coordinates = buffered.geometry.coordinates;
  let points = coordinates[0]
  let degreesArray = this.pointsToDegreesArray(points);
  this.createBuffer(Cesium.Cartesian3.fromDegreesArray(degreesArray))
} - 线缓冲区
/**
 * 创建线缓冲区
 */
CesiumBufferUtil.prototype.createLineBuffer = function () {
  var points = this.getLngLats(); // 坐标数组
  var polylineF = turf.lineString(points);
  var bufferd = turf.buffer(polylineF, this.radius);
  var coordinates = bufferd.geometry.coordinates;
  points = coordinates[0]
  var degreesArray = this.pointsToDegreesArray(points)
  this.createBuffer(Cesium.Cartesian3.fromDegreesArray(degreesArray))

} - 面缓冲区
/**
 * 多边形缓冲区
 */
CesiumBufferUtil.prototype.createPolygonBuffer = function () {
  var points = this.getLngLats(); // 坐标数组
  points.push(points[0])
  var polygonF = turf.polygon([points]);
  var bufferd = turf.buffer(polygonF, this.radius);
  var coordinates = bufferd.geometry.coordinates;
  points = coordinates[0]
  var degreesArray = this.pointsToDegreesArray(points)
  this.createBuffer(Cesium.Cartesian3.fromDegreesArray(degreesArray))
} - 通用缓冲区生成函数
/**
* 生成缓冲区
* @param {Array} array 坐标数据
*/
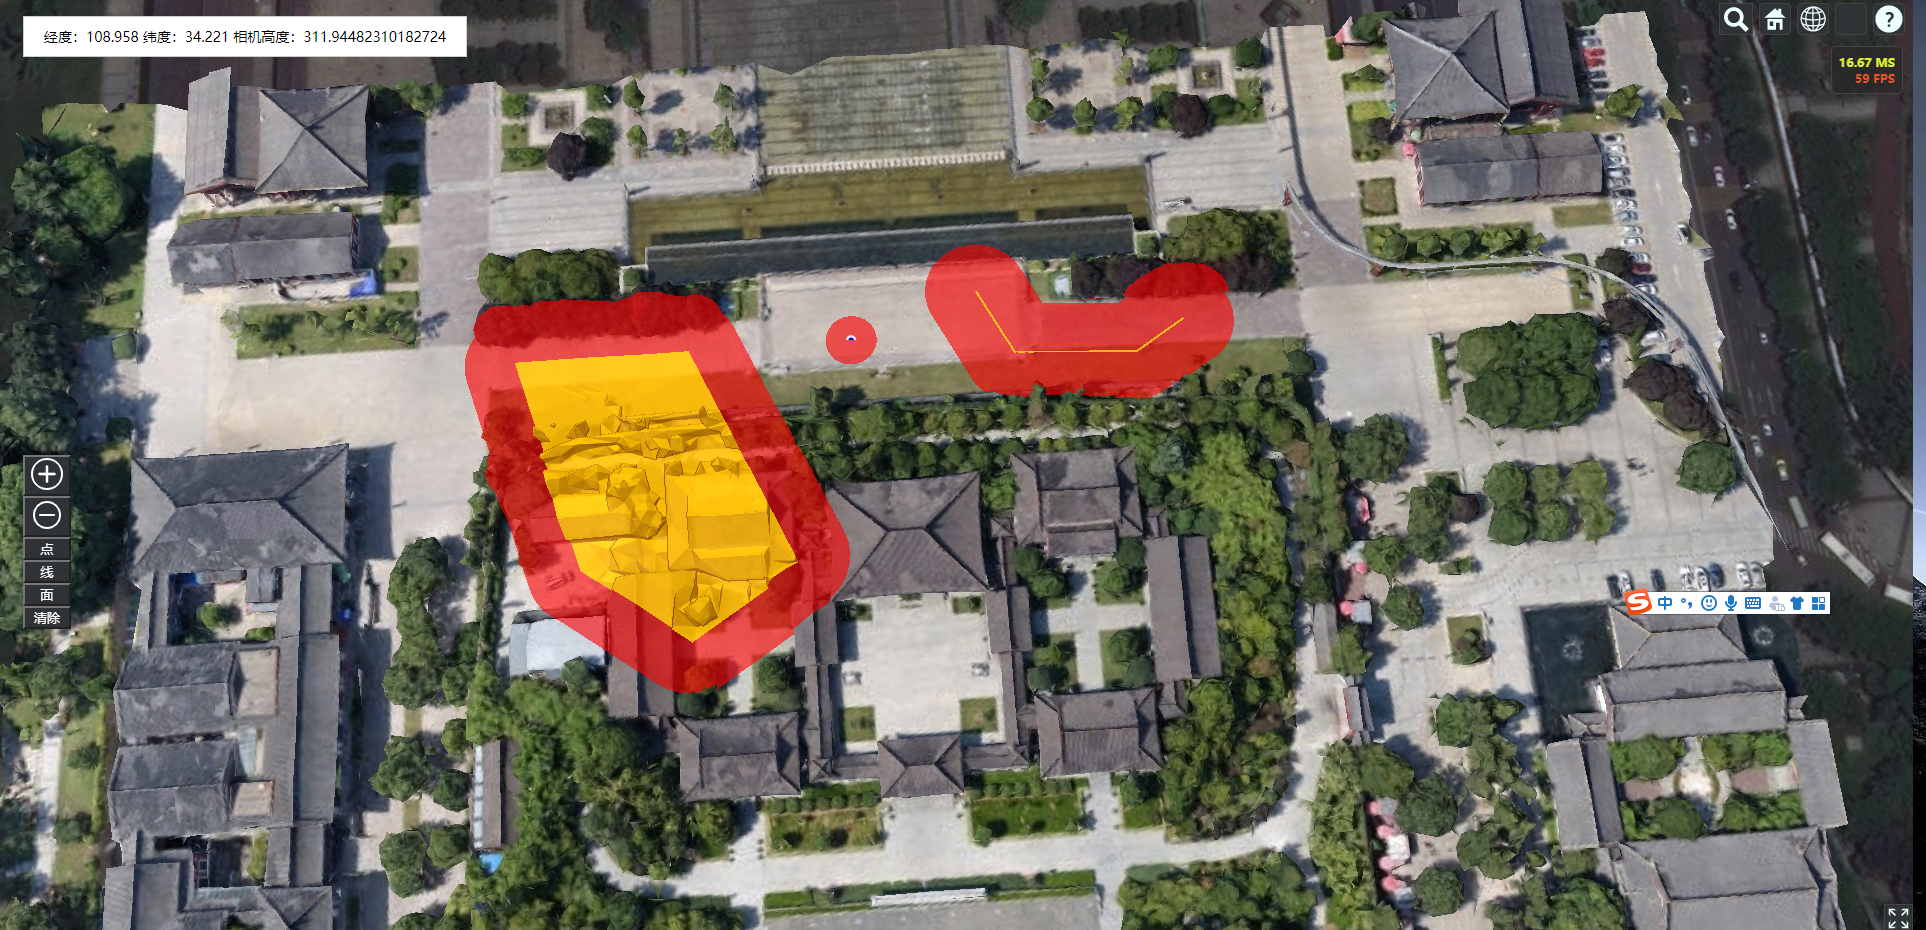
CesiumBufferUtil.prototype.createBuffer = function (array) {
const bufferPolygon = this.viewer.entities.add({
polygon: {
hierarchy: new Cesium.PolygonHierarchy(array),
material: Cesium.Color.RED.withAlpha(0.6),
classificationType: Cesium.ClassificationType.BOTH
},
});
this.bufferEntities.push(bufferPolygon)
} - 相关方法
/**
 * 获取经纬度坐标数组
 */
CesiumBufferUtil.prototype.getLngLats = function () {
  var arr = []
  for (var i = 0; i < this.positions.length; i++) {
    var item = this.cartesianToLatlng(this.positions[i]);
    arr.push(item.slice(0, 2));
  }
  return arr;
}


/**
 * 转经纬度
 * @param {*} cartesian
 */
CesiumBufferUtil.prototype.cartesianToLatlng = function (cartesian) {
  var latlng = this.viewer.scene.globe.ellipsoid.cartesianToCartographic(
    cartesian
  );
  var lat = Cesium.Math.toDegrees(latlng.latitude);
  var lng = Cesium.Math.toDegrees(latlng.longitude);
  var height = latlng.height
  return [lng, lat, height];
};

//二维数组转一维数组
CesiumBufferUtil.prototype.pointsToDegreesArray = function (points) {
  let degreesArray = [];
  points.map(item => {
    degreesArray.push(item[0]);
    degreesArray.push(item[1]);
  });
  return degreesArray;
}
示例
代码
完整代码都放到 github 上,需要的移步Cesium-demo-view
总结
缓冲区实现的过程很简单,没什么可多说的,需要注意的是二维三维坐标的转换,二维面的坐标数组要闭合。其他的就是正常的实现就行了。
音乐小憩
本博客所有文章除特别声明外,均采用 CC BY-NC-SA 4.0 许可协议。转载请注明来自 Jercky!
- 微信
- 支付宝


相关推荐


评论